
Big Batch Homemade Chocolate Pudding (From Scratch)
There’s a particular kind of quiet that settles over a kitchen when a pot of chocolate pudding is on the stove. The whisk moves in slow circles, the kitchen smells like cocoa and warm milk, and someone always wanders in to ask if it’s ready yet.
This homemade chocolate pudding is rich, silky, and deeply chocolatey, made from scratch with seven pantry staples. And it’s made in a big batch, starting with a full gallon of milk, because in a busy home, one small bowl of dessert has never been enough.
Spoon it into pudding cups for the week, serve it from a big glass bowl at your next gathering, or pour it into a crust for chocolate pudding pie. If you’re feeding a smaller crew, we’ve included a tested half batch too.
Made for a Full Table
Most chocolate pudding recipes make four to six servings. That’s a lovely dessert for a quiet night, but in a house full of kids, cousins, and neighbors who stop by, it’s gone before the dishes are done.
A big batch takes nearly the same effort as a small one. You’re still whisking one pot at one stove, but you end up with dessert tonight, a refrigerator shelf lined with pudding cups, and maybe a pie or two for the weekend. It’s the kind of recipe that makes holidays, potlucks, and Sunday dinners a little easier, and it quietly says there’s room for everyone at the table.
With a family of six and a house that’s almost always full, this pudding has become a staple in our kitchen. We tend to be the ones hosting, and between our own kids and the friends who seem to follow them home, a big pot of chocolate pudding is one of the first things they ask for. It’s the dessert that makes our kitchen feel like the place everyone wants to be.
Is Homemade Chocolate Pudding Better Than Boxed?
Homemade chocolate pudding has a richer chocolate flavor and a creamier, silkier texture than most boxed mixes. It takes only a little more time, and you control exactly what goes into it, from the quality of your cocoa to the pinch of salt that makes the chocolate shine. Once your family tastes the difference, it’s hard to go back.
A Few Notes on the Ingredients
Cocoa powder brings the chocolate flavor. Any unsweetened cocoa works. Natural cocoa gives a classic, bright chocolate taste, while Dutch-process cocoa makes a darker, smoother, more mellow pudding.
Cornstarch is what turns milk into thick, spoonable pudding. It needs a full boil to activate, which is why the one-minute boil in the instructions matters so much.
Whole milk is the heart of this recipe and gives the pudding its classic creamy texture.
Salt is small but mighty. Just a pinch makes the chocolate taste richer and keeps the pudding from tasting flat.
Butter and vanilla go in at the very end, off the heat, for a silky, glossy finish.
Big Batch Homemade Chocolate Pudding Recipe
Equipment
- Large heavy-bottomed stockpot or Dutch oven (at least 8 quarts)
- Whisk
- Individual serving cups or a large serving bowl
Ingredients
- 2 cups unsweetened cocoa powder sifted
- 1⅓ cups cornstarch sifted
- 4 cups granulated sugar
- Pinch of salt or up to ½ teaspoon to taste
- 16 cups 1 gallon whole milk
- 16 tablespoons 1 cup butter
- 4 teaspoons vanilla extract
Instructions
- Sift the cocoa powder and cornstarch into a large, heavy-bottomed stockpot or Dutch oven.
- Add the sugar and salt. Whisk the dry ingredients together until evenly combined.
- Slowly pour in the whole milk, whisking continuously as you pour to create a smooth mixture.
- Place the pot over medium heat. Cook, stirring constantly and making sure to reach the bottom and corners of the pot to prevent scorching, until the pudding thickens and comes to a boil.
- Once the pudding reaches a boil, continue cooking and stirring for 1 additional minute.
- Remove the pot from the heat. Add the butter and vanilla extract. Stir until the butter has completely melted and the pudding is smooth and glossy.
- Pour the pudding into individual serving cups, shallow containers, or a large serving bowl.
- Allow the pudding to cool slightly, then refrigerate within 2 hours. Chill for at least 4 hours, until completely set.
Notes
Half Batch Homemade Chocolate Pudding
If a full gallon batch is more than you need, this half batch has been tested in our kitchen and works beautifully. It still makes plenty for a family, just in a more manageable pot.
Makes: Approximately 12–16 servings
- 1 cup unsweetened cocoa powder, sifted
- ⅔ cup cornstarch, sifted
- 2 cups granulated sugar
- Pinch of salt
- 9 cups whole milk
- 8 tablespoons (½ cup) butter
- 2 teaspoons vanilla extract
Follow the same instructions as the full recipe. A half batch comes to a boil more quickly, so keep a close eye on the pot. A large heavy-bottomed saucepan or Dutch oven (at least 5 quarts) works well for this amount.
Take It Up a Notch: How to Elevate the Flavor
This pudding is wonderful just as it is. But if you’d like to make it richer, deeper, or a little more special for company, these simple additions make a big difference.
Add instant espresso powder. This is the secret bakers have used for years. A little espresso doesn’t make the pudding taste like coffee. It deepens the chocolate and makes it taste more like itself. Whisk 1 to 2 tablespoons of instant espresso powder into the dry ingredients for the full batch, or 2 to 3 teaspoons for the half batch. It does add a small amount of caffeine, so if you’re serving little ones, decaf instant espresso works just as well.
Stir in chopped chocolate. For an even silkier, more luxurious pudding, stir a few ounces of finely chopped semisweet or bittersweet chocolate in with the butter and vanilla until melted.
Use a little more salt. Increasing the salt to ½ teaspoon brings out the chocolate’s depth without making the pudding taste salty.
Warm it up with spice. A teaspoon or two of cinnamon whisked into the dry ingredients gives the pudding a cozy, Mexican hot chocolate feel.
Make it festive. For the holidays, swap part of the vanilla for peppermint extract, adding a little at a time and tasting as you go, then top with crushed candy canes.
Tips for the Best Homemade Chocolate Pudding
Sift, then whisk the dry ingredients. Sifting removes lumps, and whisking the cocoa, cornstarch, sugar, and salt together before adding milk helps everything blend smoothly.
Add the milk slowly. Pour gradually while whisking to keep the mixture smooth from the start.
Stay with the pot. Milk scorches easily, especially in a large batch. Keep stirring, and reach into the bottom and corners where pudding likes to stick.
Leave a scorched bottom behind. If a little pudding catches on the bottom of the pot, don’t scrape it in. That keeps any burnt flavor out of the rest of the batch.
Common Chocolate Pudding Problems (and How to Fix Them)
Why is my homemade pudding lumpy?
Lumps usually come from cocoa or cornstarch that wasn’t fully mixed before heating. Pour the warm pudding through a fine mesh strainer, and it will be smooth again.
Why didn’t my chocolate pudding set?
Pudding that doesn’t set usually didn’t boil long enough. Cornstarch needs a full boil for about a minute to thicken. Pudding also needs at least 4 hours in the refrigerator, so give it time before deciding it’s too thin.
Why does my pudding taste burnt?
The milk scorched on the bottom of the pot. Use a heavy-bottomed pot, keep the heat at medium, and stir constantly as the pudding gets close to boiling.
Pudding Cups, Pies, and Pretty Ways to Serve
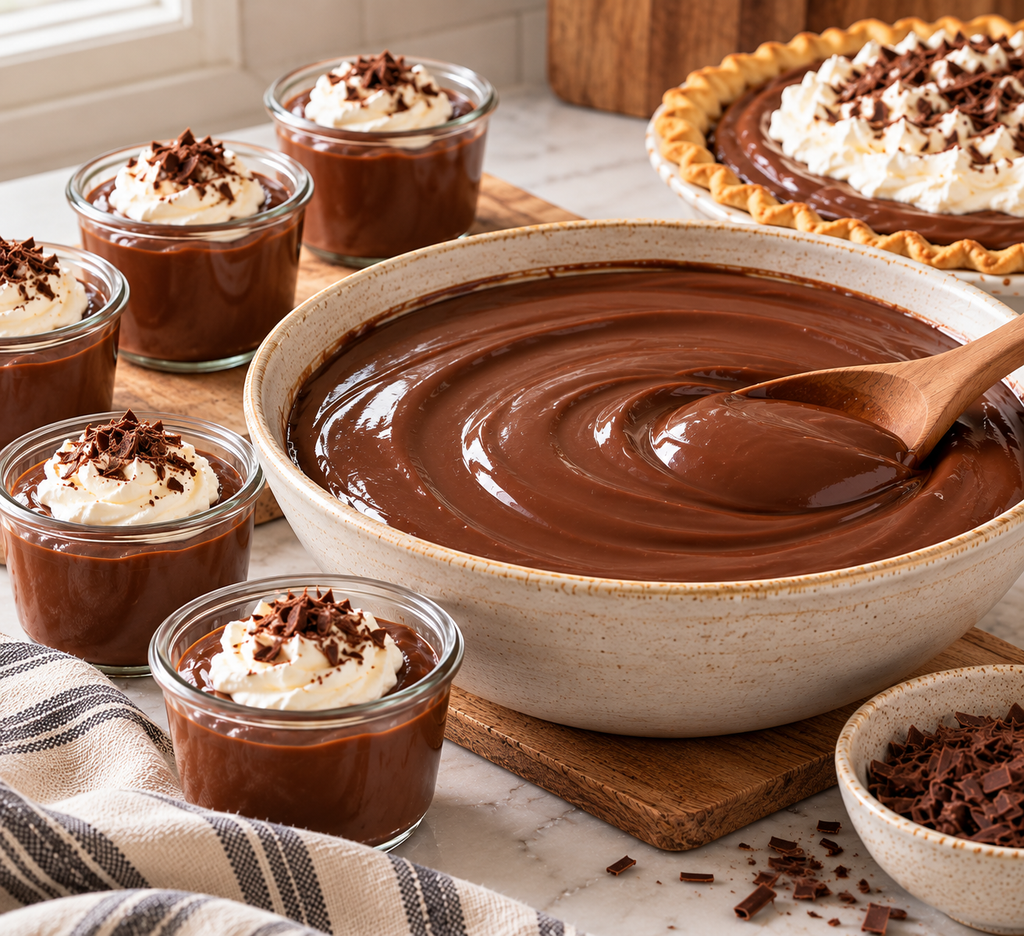
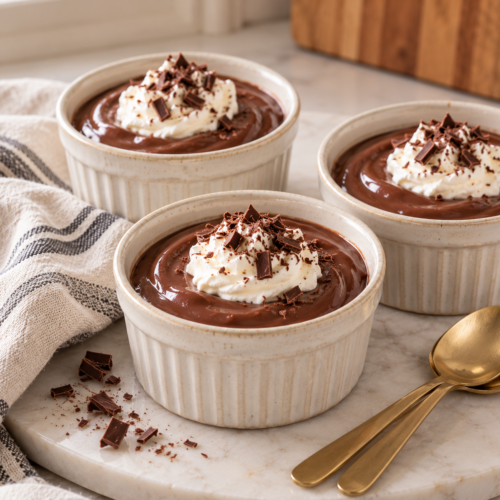
Homemade pudding cups: Portion the warm pudding into small lidded jars or containers, 4 to 6 ounces each. Once chilled, you’ll have a refrigerator shelf lined with homemade dessert, ready for after-dinner treats, afternoon snacks, or a sweet surprise in someone’s lunchbox.
Chocolate pudding pie: Pour the warm pudding into a fully baked pie crust or graham cracker crust, press plastic wrap onto the surface, and chill for at least 4 hours. Top with softly whipped cream just before serving. A full batch fills several pies, or make one pie and portion the rest into cups.
For a crowd: Serve the pudding in a glass trifle bowl or large footed dish at the center of the dessert table. Set out small bowls of whipped cream, fresh berries, crushed chocolate cookies, and chocolate shavings, and let everyone build their own. It’s simple, beautiful, and a hit with guests of every age.
How Long Does Homemade Chocolate Pudding Last?
Homemade chocolate pudding lasts 3 to 4 days covered in the refrigerator, which makes it a wonderful make-ahead dessert. Freezing isn’t recommended, since cornstarch pudding tends to turn watery and grainy once thawed.
Frequently Asked Questions
Can you use a lower-fat milk instead of whole milk?
Whole milk gives the richest, creamiest results. Lower-fat milk will make a lighter pudding that may be slightly less thick.
Can you eat chocolate pudding warm?
Yes. Warm pudding is soft and spoonable, almost like a thick chocolate sauce, while chilled pudding is firm and creamy. Both are delicious.
Does espresso powder make pudding taste like coffee?
Not in small amounts. Instant espresso powder deepens the chocolate flavor without adding a noticeable coffee taste.
Worth Sharing
Homemade chocolate pudding isn’t complicated or trendy. It’s the kind of recipe that keeps showing up because it brings people together: a big bowl after Sunday dinner, a row of pudding cups waiting in the refrigerator, a chocolate pie on the holiday table.
So pull out your biggest pot, grab your whisk, and make something worth sharing.